Technique: Fret replacement
Today, at the Esprit Guitare lutherie workshop, I want to talk to you about technique!
I will describe to you in pictures the different stages of replacing the frets of a guitar. Here, the demonstration will be done on an electric guitar (Fender Stratocaster), but the process is essentially the same for an acoustic guitar or a bass.
Fret replacement: when and why?
Worn frets are characterized either by the disappearance of the rounding of one or more frets (usually several), or by very marked wear in places.
If the wear is not too pronounced but is significant enough to cause discomfort (buzz, friezes), then we can simply carry out a total or partial fret leveling (plane all the frets to put them back at the same level) before redoing the crowning (the rounding of the top of the fret).
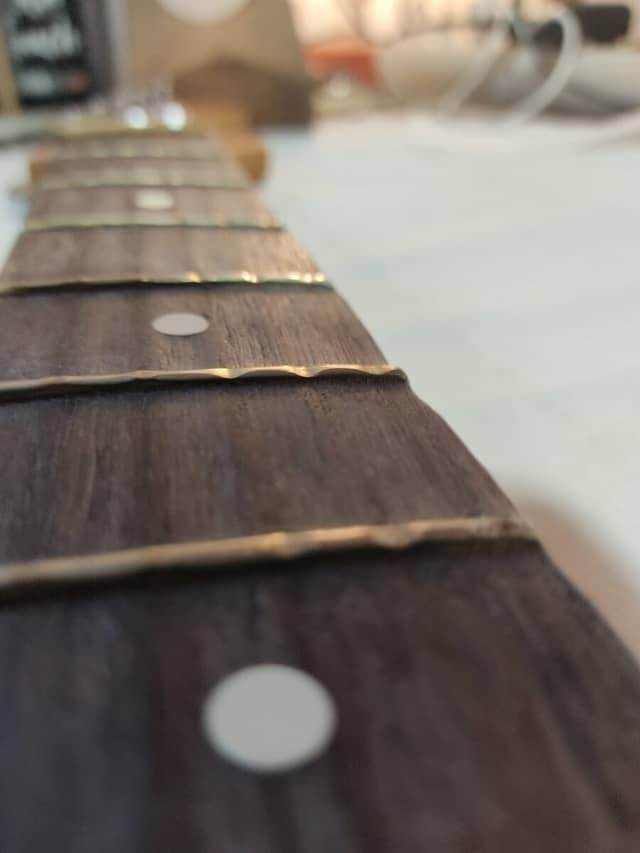
In the example I present to you, the wear is very pronounced. Far too much for us to be satisfied with a fret leveling.
This is already the condition of the frets when the guitar arrived at the workshop.
In this case, the only way to get a playable neck back is to replace the frets.
Step 1: Remove Old Frets
So, casually, this is the most delicate operation.
This involves removing the old frets without damaging the fingerboard. Depending on the wood used for the fingerboard, the installation method used for the frets, the glue possibly used, the humidity level of the wood, the setting of the fret, the extraction technique, etc… There are a million reasons for the operation to go well, or badly…


The risk is to split the wood on the edge of the “slot” (slot in which the fret is inserted). So you have to be very precise and attentive to the reaction of the wood during this stage. And go there slowly.
Step 2: Sanding the Fingerboard
Here, the objective is to take advantage of the absence of frets to give the fingerboard a facelift. We therefore sand the fingerboard with sanding blocks whose radius (curvature) corresponds to that of the original fingerboard. You can also change the radius at this time, if you wish.


At the end of this step, we will redefine the slots with a saw adapted to the size of the foot of the new frets, then clean the slots well.
Step 3: Bending and Cutting the New Frets
To fit the new frets more easily, we will give them the curvature corresponding to the radius of the neck. Or even a bit more curved to be sure that the ends will not “bend” during installation. For this I use a special tool which allows me to bend the frets to the desired radius.


And then, we cut the bar (curved, therefore) of frets to the desired length for each fret.
Step 4: installing new frets
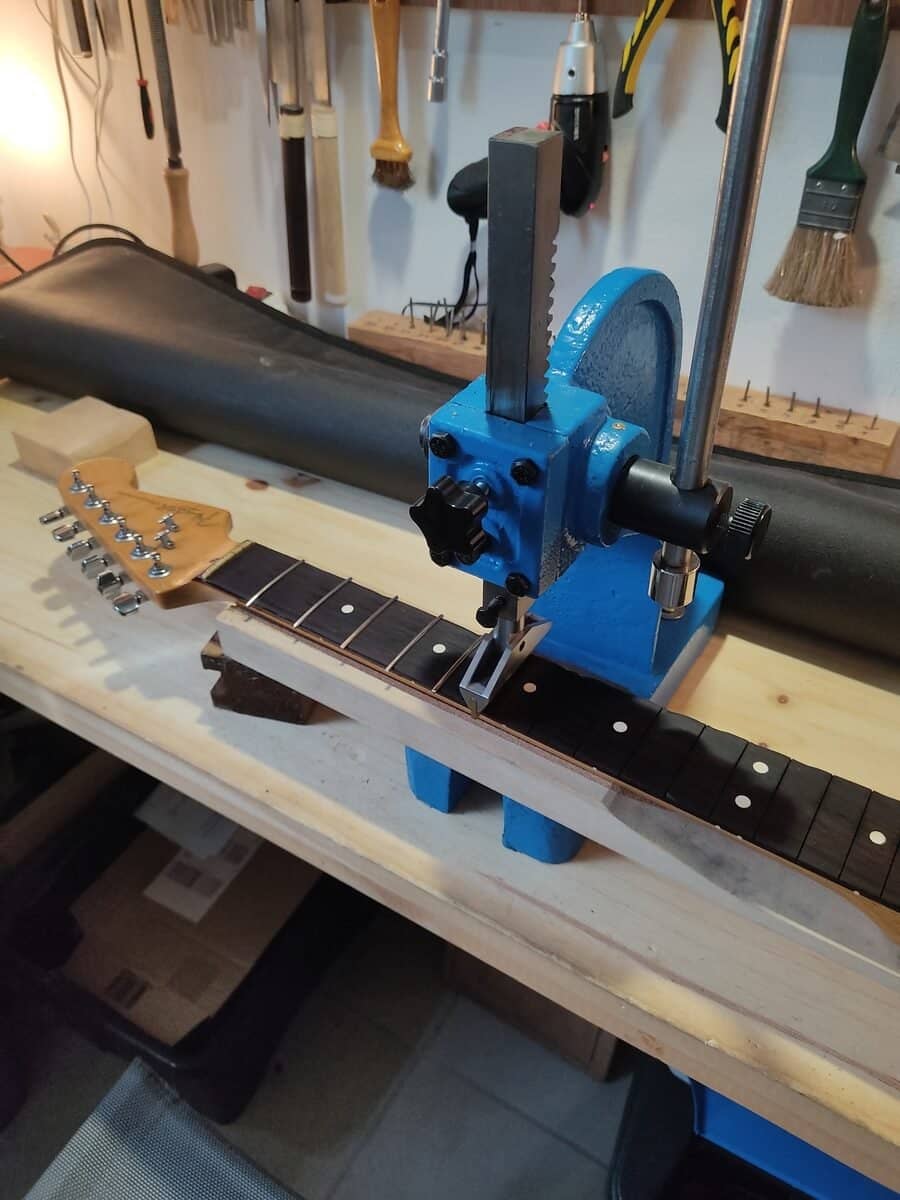
At this point I take out the fret press. There are plenty of methods for installing frets, but I find that the most effective method for doing a neat and precise job is the press. This allows each fret to be adjusted very precisely according to the previous ones and to limit the fret leveling step (which we will see later).


At this stage, we have a fretted neck, with frets sticking out. We will start by cutting the ends flush with the handle with special pliers.
Then we check the fret leveling and correct it with the press before gluing the frets by injecting super glue onto the foot of each fret, through the edge, at both ends.
For the remaining small fret leveling defects (some cannot be corrected with a press), we wait until the glue has dried before filing the frets a little too high and proceeding to crown them (redo the rounding with the special file).
Step 5: Finishing the Fret Ends
We attack the longest and most tedious part: the finishing touches.
You must start by filing the ends of the frets flush with the neck. First at 90 degrees from the fret (along the edge of the neck), then at 35 degrees to give it the right angle. Here again, you need a special tool if you want a quality result.
Once the ends are roughed and at 35 degrees, we will break, rounding the angles of the metal at the end of each fret. Fret after fret, we will file by hand the small protruding angles of the rounded ends so that the guitarist’s hand is not scratched when it slides along the neck.


Then, we carry out the maintenance of the fingerboard (hydration, nourishing with oil), a new check and possible adjustment of the fret leveling, the polishing of the frets before reassembly.
Step 6: Reassembly and Adjustment
Once the neck is reattached to the body and the strings are reassembled, the neck can be put back into tension. Theoretically at this stage, the fret leveling should be good, but we sometimes have surprises depending on the wood of the fingerboard. So we still control. If it is necessary to readjust, we relax the strings and readjust (file, crowning, polishing, etc.).
And we move on to the adjustment. We installed new frets, so probably higher than the worn frets. So the adjustment of the action must be redone.
When all that is done, we can move on to the cool moment: the test 🙂


So ! You know everything about refretting!
The Esprit Guitare workshop
The Esprit Guitare lutherie workshop welcomes you by appointment for maintenance, repair, setup or customization of guitars, bass, ukulele and more 😉
Feel free to contact us or book an appointment.
 06 96 36 77 41
Esprit Guitare – a passion for instruments in Martinique.
#espritguitare #lutherie #guitartech #guitar #bass #martinique